Nowadays, where millions of apps are being developed and released every year, how can app creators ensure the success of their products amidst such fierce competition? The answer lies in the strategic implementation of a Minimum Viable Product (MVP) approach, which is proven to increase the chances of delivering a successful app to the market.
Statistical data reinforces the importance of the MVP strategy for app development. According to a study conducted by CBInsights, one of the top reasons why startups fail is the lack of market demand for their products, accounting for 42% of failure cases. This highlights the significance of validating an app’s market potential before fully investing in its development.
By starting with an MVP, app developers can gather valuable user feedback and iterate on their product based on real-world data. This iterative development process minimizes the risk of spending time and resources building features that may not be well-received or necessary.
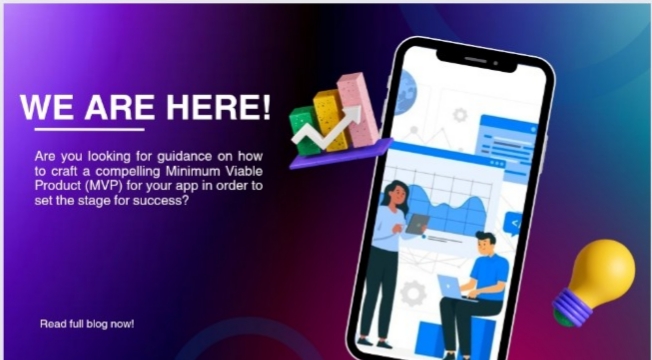
Want to know more about this? In this blog, we will explore what an MVP is, why it is important, and how to create a successful MVP for your app.
What is a Minimum Viable Product (MVP)?
A Minimum Viable Product (MVP) is a version of your app that includes only the core features needed for it to function. It serves as a prototype that allows you to test your product hypothesis and gather feedback from users with minimal development effort. The primary goal of an MVP is to validate your app idea, reduce the amount of time and resources spent on development, and ensure that you are building the right product.
Why is an MVP Important?
Building an MVP for your app is crucial for several reasons:
- Reduced Time to Market: Developing a full-featured app from scratch can be time-consuming and costly. By focusing on the core features, an MVP allows you to launch your app in a shorter time frame, giving you a competitive edge.
- User Feedback and Validation: An MVP enables you to collect valuable feedback from real users, allowing you to validate your app idea and make informed decisions based on user preferences and needs. Early user feedback can help you identify and fix flaws, prioritize features, and enhance the overall user experience.
- Cost-Effective Development: Developing and maintaining a fully-featured app can be expensive, especially if the market demand for your idea is uncertain. By investing in an MVP, you can save time and resources by avoiding unnecessary development efforts on features that may not be well-received.
- Iterative Development: An MVP encourages an iterative approach to development, allowing you to continuously update and improve your app based on feedback and user behavior. This iterative process ensures that your app stays relevant in the market and meets the evolving needs of users.
Steps to Create a Successful MVP
Creating a successful MVP involves a systematic approach that focuses on the core functionalities of your app. Here’s a step-by-step guide to help you get started:
1. Define the core problem
Before starting the development of an MVP, it’s crucial to precisely define the core problem that your product is trying to solve. Here are the steps to define the core problem:
- Conduct Thorough Market Research: For conducting market research, you can use various online tools, like Google Trends, to identify the most popular search terms and topics. Another aspect involves analyzing current market trends, industry reports, and competitors to discover the problem a product can help solve.
- Understand User Needs: Interview potential users to identify their preferences, what they need, what problems they face, and how your product solves those problems.
- Identify the Pain Points: Understand the pain points that a user faces regarding your product or service to target those issues and design your MVP accordingly.
Example: Rayner Software was looking for a way to provide users with straightforward time-tracking software that integrates with project management systems like Basecamp. The pain point was the cumbersome time-tracking process, which required logging hours in multiple tools, which motivated the team to develop HourStack.
2. Identify the target audience
Once the core problem is defined, identifying the target audience for your MVP is crucial, as it helps you tailor your product to their needs and preferences. Here are the steps to identifying the target audience:
- Conduct User Research: Interview potential users to identify their demographic characteristics and interests.
- Create User Personas: Develop user personas – a user persona is a representation of a specific user group with shared characteristics. These personas embody the characteristics of potential users and guide the design and development of an MVP.
Example: In 2006, Netflix realized that its primary target audience was “people who watch movies.” That statement wasn’t helpful, so they created a user persona, “Lovers of Obscure Foreign Films.”
3. Prioritize features
One of the key strategies for creating a successful MVP is to prioritize features. Prioritization involves understanding the user’s needs and selecting the most useful features to deliver the core value of your product. Here are the steps to prioritize features:
- Create a List of Features that Address the Core Problem: Determine which features will address the core problem for your target audience.
- Evaluate the Potential Benefit Against Development Effort: Evaluate each feature’s potential to deliver value to users against the development time and effort needed.
- Determine the Essential Features: Select the features with the most significant potential benefits and deliver value to users.
Example: The social media app Instagram launched as an MVP in 2010 with only one feature: sharing photos. They excluded complex features like messaging, commenting, and filters.
4. Develop a prototype
Once you have prioritized the features, it’s time to develop a prototype of your MVP. Building a prototype helps validate the product concept and gather feedback to iterate before moving to full-scale development. Here are the steps to developing a prototype:
- Choose a Tool for Prototyping: Choose a suitable prototyping tool, e.g., Figma, Sketch, Axure, or Adobe XD, or use paper sketches.
- Build the Prototype: Use your MVP priority feature list as a guide to design and build a prototype.
- Get Feedback: Share the prototype with your target audience and gather their feedback to iterate and improve.
Example: Dropbox started with a video demonstration presenting how they would create an MVP that enabled users to access a single folder on one or more devices, ultimately leading to a successful product.
5. Test and iterate
Testing and iteration are critical steps in the MVP development process. Gather feedback from users and iterate on your product. Here are the steps to test and iterate:
- Conduct User Testing: Ask for user feedback and measure their reactions to the developed prototype.
- Collect User Feedback: Users can offer valuable insights and suggest improvements to your MVP.
- Iterate Based on Feedback: Use feedback to improve the user experience and product functionality.
Example: Facebook’s MVP evolved through iterations based on user feedback after launching Facebook, a Harvard-only MVP, by adding more schools in the Boston area and eventually expanding beyond universities.
6. Launch and measure
After iterating on your MVP, it is time to launch it on the market. Launching an MVP involves making it available to early adopters and measuring its success. Here are the steps to launch and measure:
- Limited Launch: Launch your MVP to a small targeted group, measuring feedback and user engagement.
- Track and Analyze User Metrics: Metrics such as user engagement, conversion rates, and customer feedback can help measure the success of your MVP.
- Identify Areas of Improvement: Review user metrics and feedback to identify what needs to be improved.
Example: Airbnb started as an MVP website in 2007. Founders posted their own space for rent and provided a simple web page to book a place – an MVP that helped them get started, and today, it has changed the way people travel.
7. Pivot or proceed
Based on the feedback and metrics gathered during the launch phase, it is crucial to assess whether your MVP is successful or requires a pivot. Here are the steps to pivot or proceed:
- Analyze User Feedback Carefully: Evaluate user feedback and metrics to assess whether the MVP requires pivoting.
- Pivot When Necessary: If feedback suggests the need for a pivot, adjust your product strategy to better align with user needs and market demand.
- Proceed with Enhancements: If the MVP is successful, add more features and enhance the product.
Example: YouTube started as a dating website, but since users began sharing videos, it has evolved by pivoting to a video hosting and sharing website that we know today.
Conclusion
Creating a successful MVP for your app requires meticulous planning, understanding your target audience, prioritizing features, developing a prototype, testing, iterating, and measuring.
By following these steps, you can ensure that your MVP addresses the core problem and resonates with your users.
Remember to constantly gather user feedback and iterate on your product to optimize its functionality and user experience. If you need assistance developing your MVP or performing any other tech-related tasks, TechRev is here to help.
Contact us today and let us bring your app idea to life!